Google Tag Manager install guide
Add Velo to Google Tag Manager
Install the Velo cookie banner and Google Consent Mode v2 with one tag from the Velo CMP template in Google’s Community Template Gallery. There’s no code to add to the page and no Custom HTML. You configure the tag, set the trigger and publish, and the whole thing takes about ten minutes.
Instructions and image sources reviewed 18 November 2026.
Works with the platforms you build on












What you need on Google Tag Manager
Once it is live
- Your banner follows the defaults you set for each visitor’s region.
- Tags wait until the visitor has chosen.
- Every choice is recorded, and Consent Mode v2 passes it on to your Google tags.
Install Velo once, then hold your tags
Pick the route that matches how your site already loads its tags. Both end with the same banner and the same signals.
Install through Google Tag Manager
You need a web container that’s already installed on your site. From there you add the Velo CMP template from the Community Template Gallery, create one tag with your site ID, test it in Preview and publish. We captured every screen below on 18 November 2026.
Hold any tag back until its category is allowed
Google’s own tags follow Consent Mode. Any other tag can be made to wait for its category with one variable and one trigger. The example below holds a tag back until analytics is allowed.
One tag from the Velo CMP template, fired on Consent Initialization. Test it in Preview, then publish.
Everything a consent setup needs
The same banner, records and scans on every plan. Pro adds unlimited sites, unlimited scans and your own logo.
Your banner asks in the visitor’s language and follows the defaults you set for their region.
Every choice is recorded, and Consent Mode v2 passes it on to your Google tags.
Install through Google Tag Manager
You need a web container that’s already installed on your site. From there you add the Velo CMP template from the Community Template Gallery, create one tag with your site ID, test it in Preview and publish. We captured every screen below on 18 November 2026.
Open the template gallery
In your web container, open Templates. In the Tag Templates box, click Search Gallery.
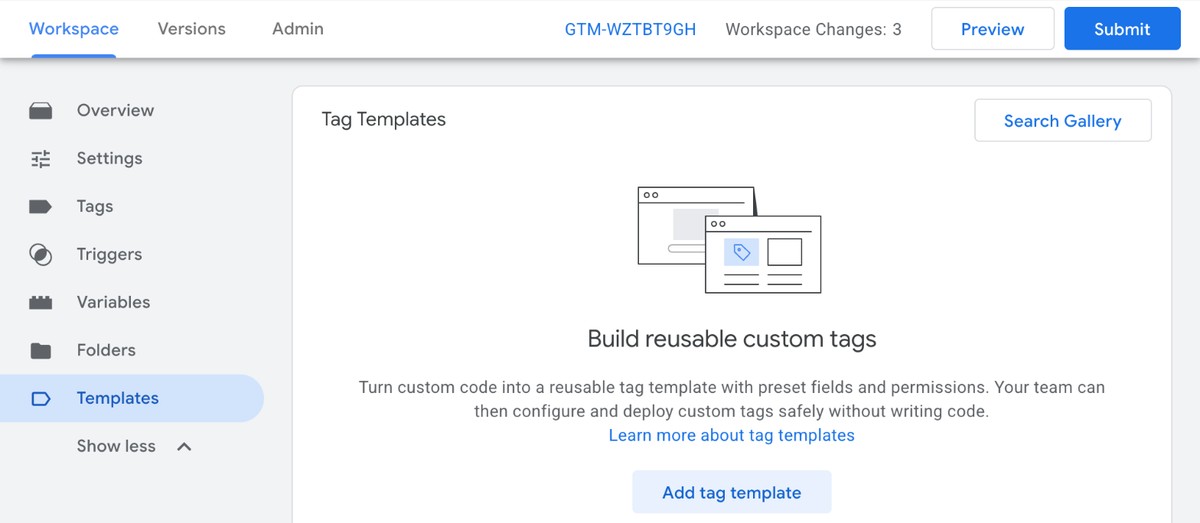 Templates, with Search Gallery at the top right of the Tag Templates box.
Add Velo CMP to your workspace
Click the magnifying glass and search for Velo CMP. Open the result published by veloconsent, click Add to workspace, then Add. Tag Manager lists what the template may do before it adds it: load the Velo script, read and set the consent state, and write to the data layer. The template source is public on GitHub.
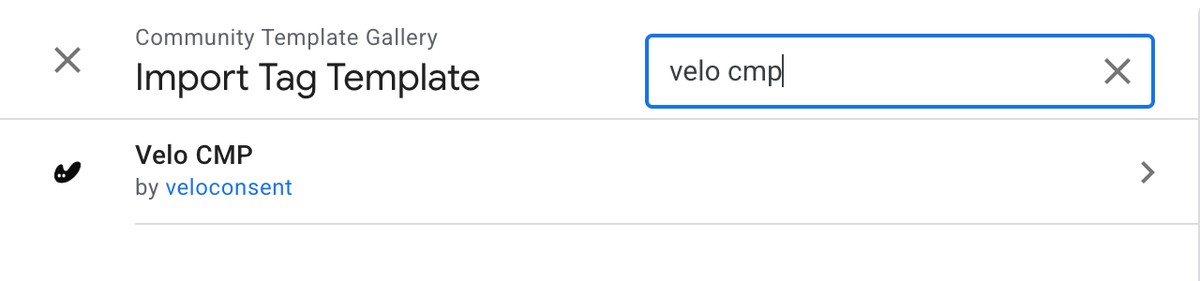 Search the gallery for Velo CMP.
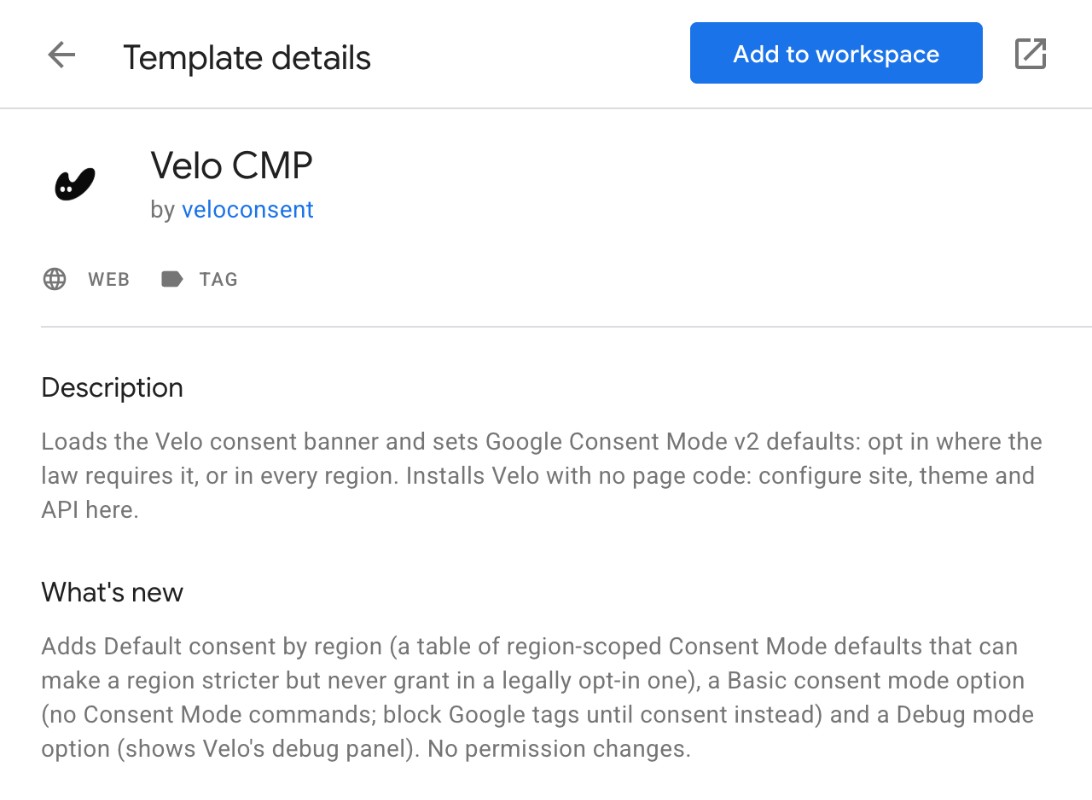 The template’s page, with Add to workspace at the top.
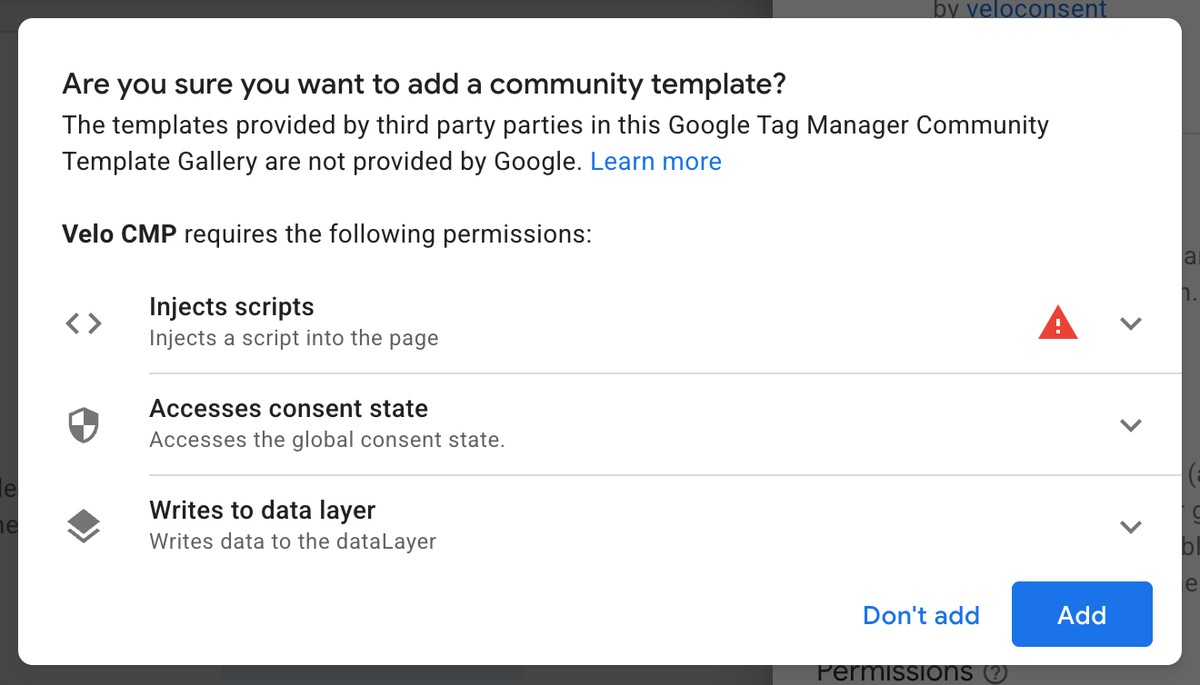 Tag Manager lists the template’s permissions before it adds it.
Create a tag from the template
Open Tags and click New. Click Tag Configuration and choose Velo CMP, which is now listed under Gallery.
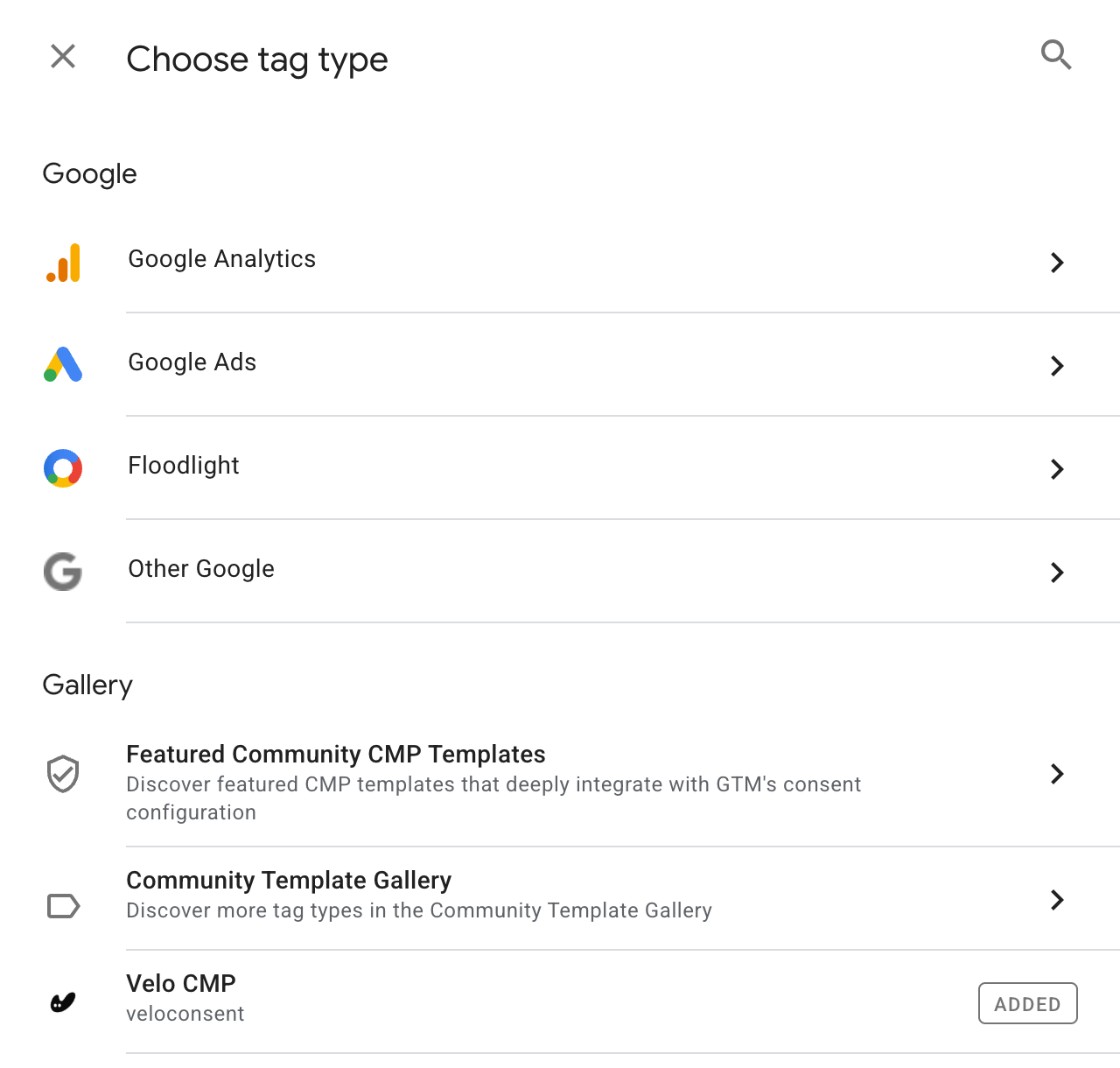 Velo CMP appears under Gallery once the template is in your workspace.
Paste your site ID
Copy your site ID from your Velo dashboard and paste it over default in Velo site ID. Leave Velo API endpoint as it is unless your dashboard shows a different address. Banner theme and Banner language can stay as they are.
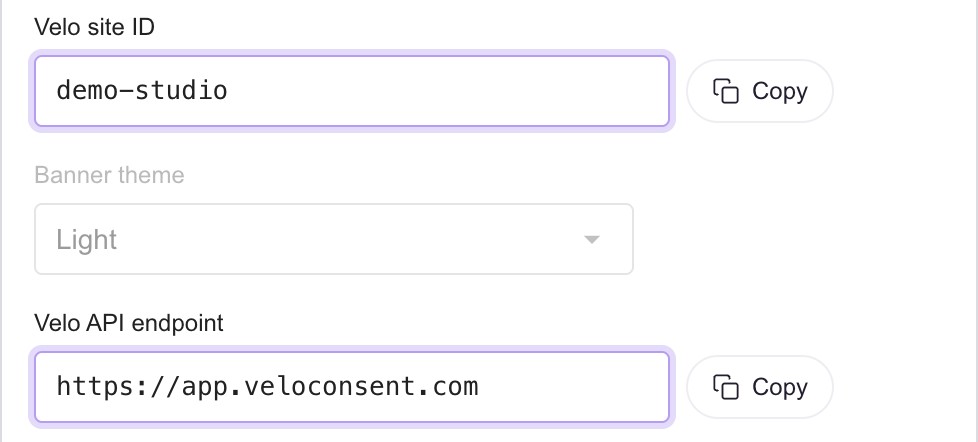 In Velo, the Google Tag Manager tab of the install step shows both values with a copy button.
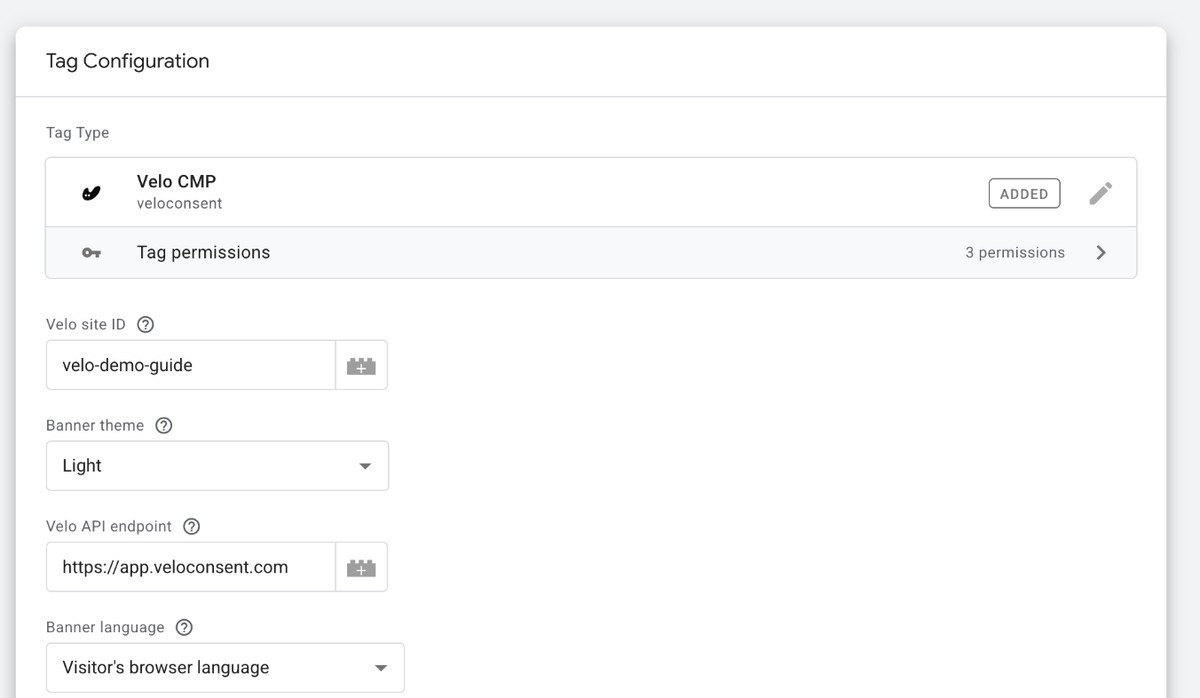 The tag with a site ID pasted in. Every other field keeps its default.
Check the optional settings
For a normal install, leave everything below Banner language alone. Require opt-in in every region asks every visitor first, including where the law doesn’t require it. Default consent by region can make a region stricter. Tick Basic consent mode only if you turned Google Consent Mode v2 off in Velo. Under Advanced you can override the banner’s heading and message, set your cookie policy URL, and switch on ads_data_redaction or url_passthrough, which are both off by default. Leave the two overrides empty to use the copy from your dashboard.
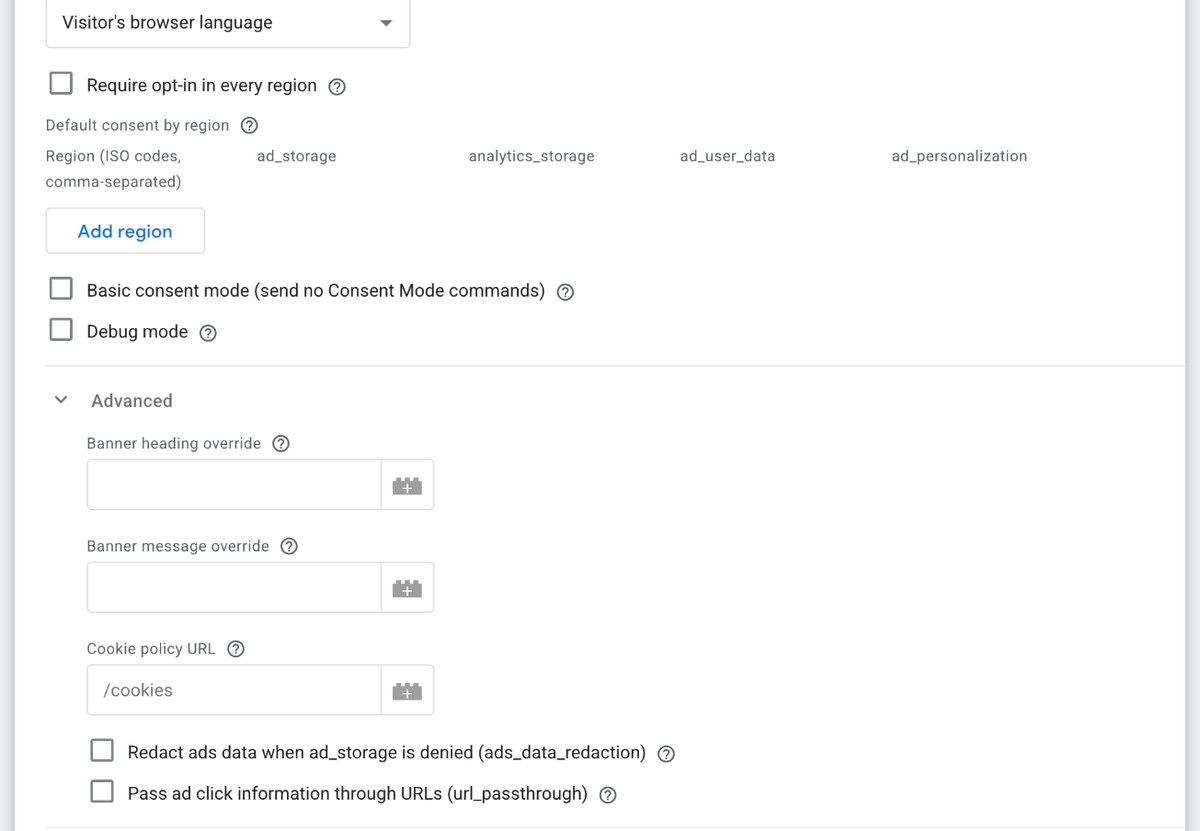 The optional settings with Advanced open. A normal install doesn’t need any of them.
Fire on Consent Initialization – All Pages
Click Triggering and choose Consent Initialization - All Pages. This is Tag Manager’s consent trigger and it runs before every other trigger, so Velo sets the consent state before your other tags read it. Name the tag and click Save.
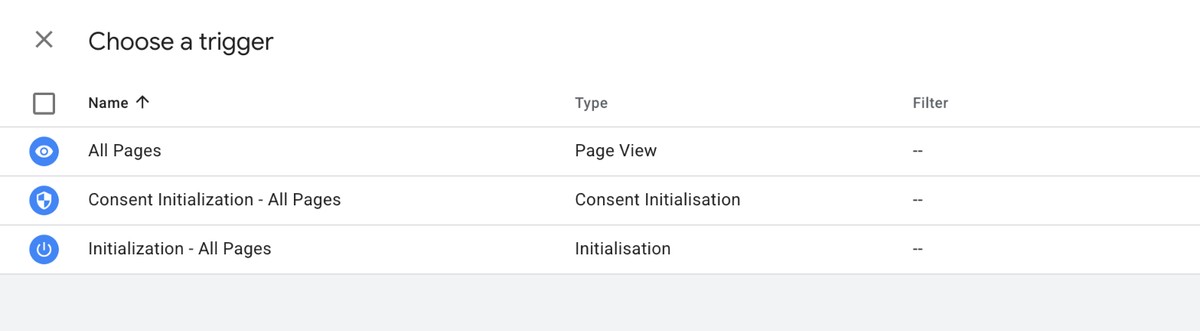 Choose Consent Initialization - All Pages.
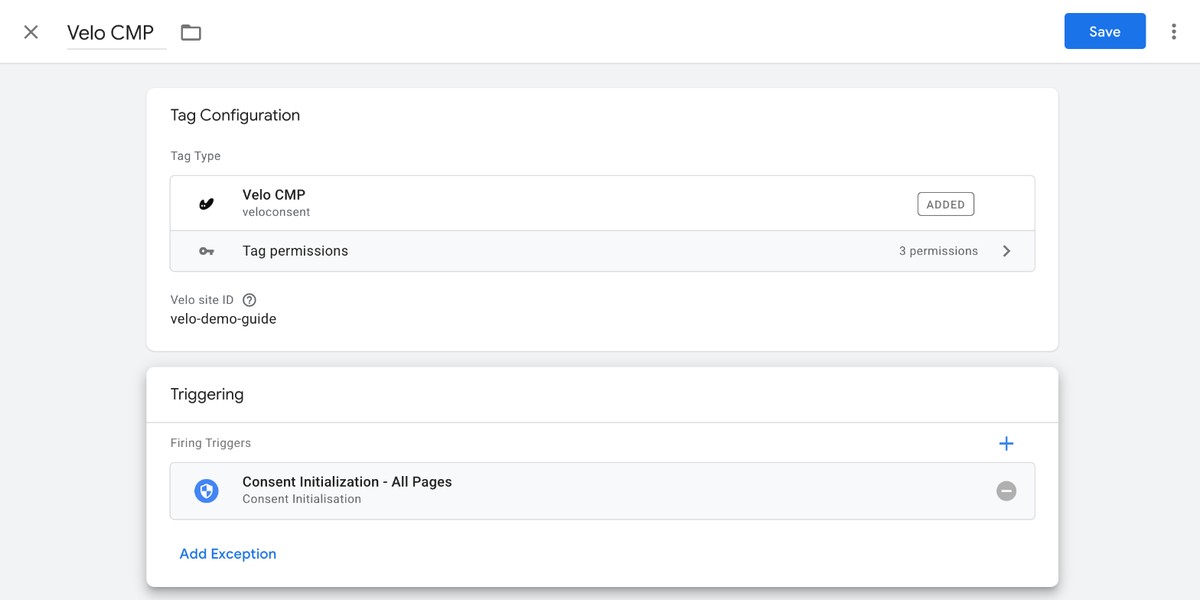 The finished tag, with Velo CMP, your site ID and one trigger.
Enable the consent overview
Open Admin, then Container Settings, tick Enable consent overview and save. A shield icon appears on the Tags screen. It opens a list of every tag with the consent types it checks, so you can see which tags need a consent setting of their own. It doesn’t turn Consent Mode on, though. The consent defaults and updates come from the Velo tag.
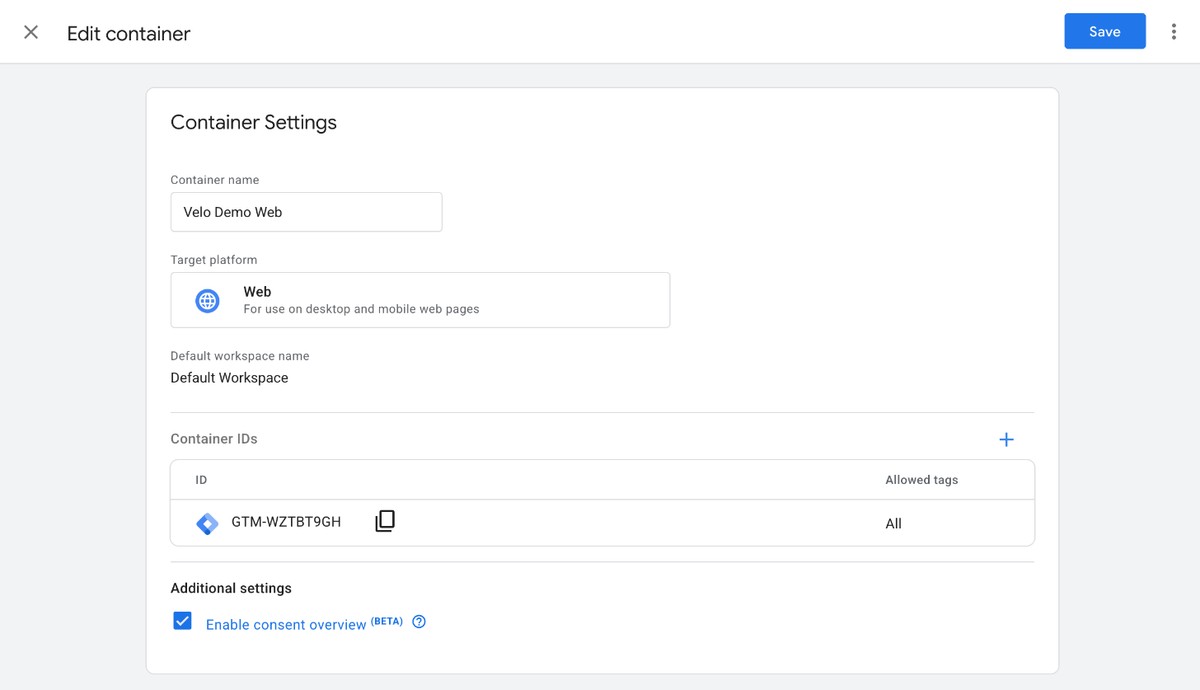 Enable consent overview is under Additional settings.
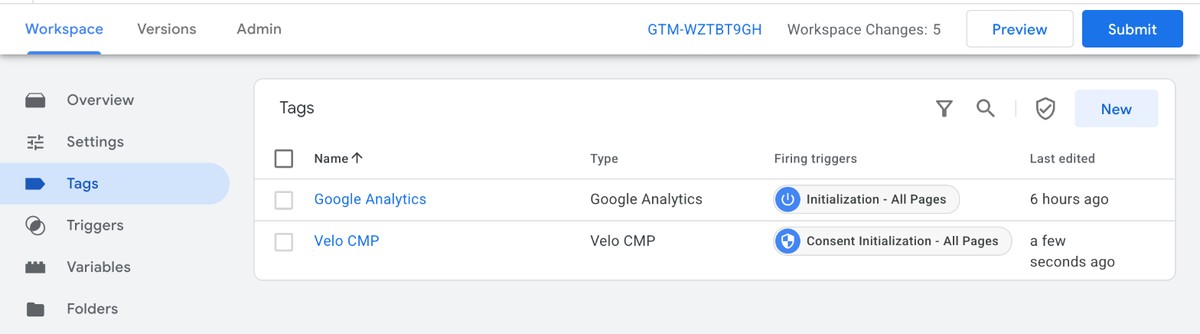 The shield icon next to New opens the consent overview.
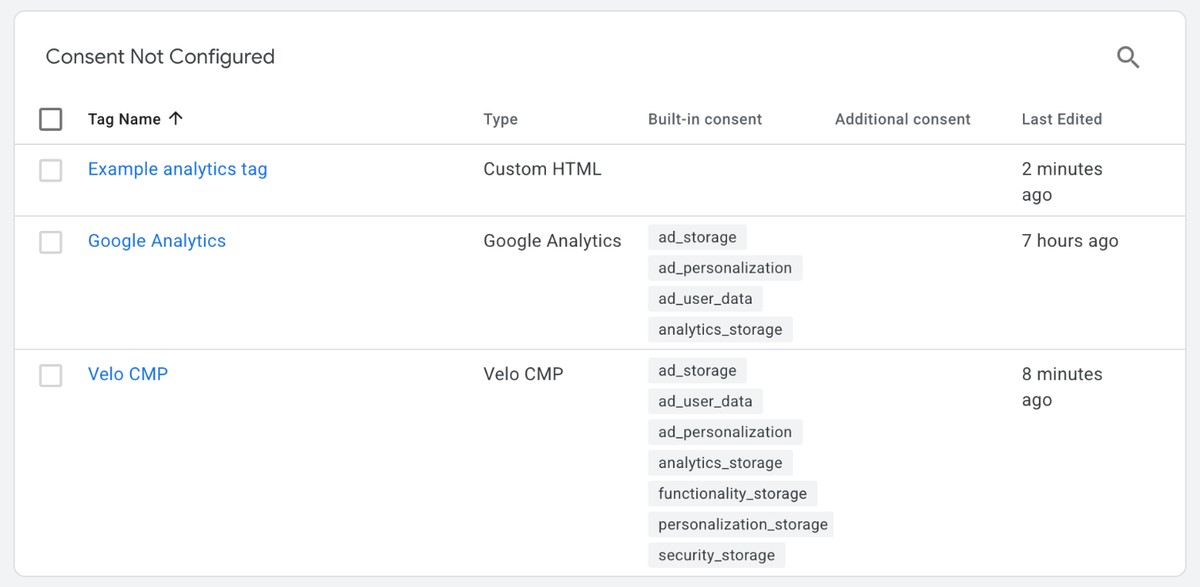 Each tag with the consent types it checks. A Custom HTML tag checks none, so it needs a trigger of its own.
Test it in Preview
Click Preview, enter your site’s address and click Connect. Your site opens in a new window with the banner. In Tag Assistant, select Consent Initialization and check that Velo CMP is the tag that fired. Open the Consent tab on a later event to see the default state. Then accept on your site and select velo_consent_update to see the update. Try Reject and a partial choice as well. To confirm that the same state reaches Google Analytics, follow Check Consent Mode in GA4.
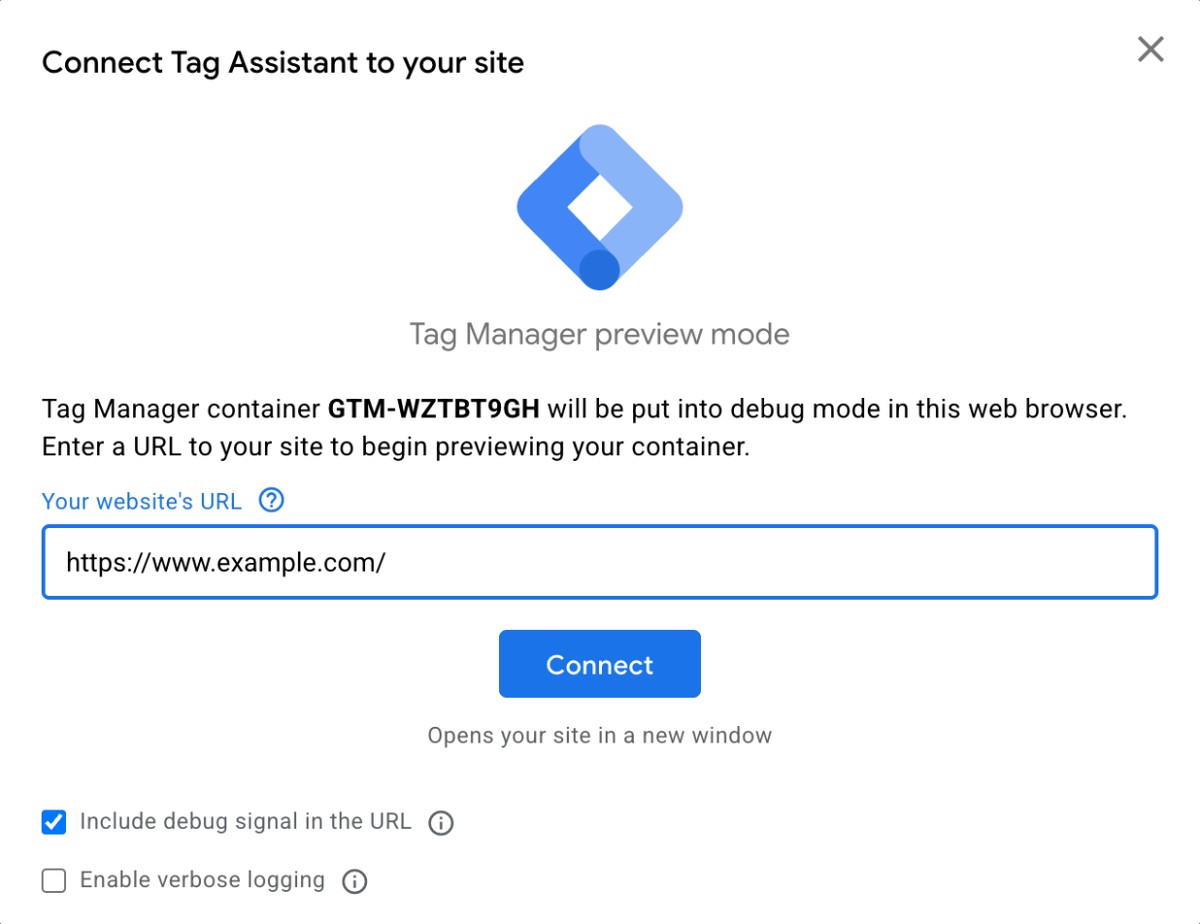 Enter your site’s address and click Connect.
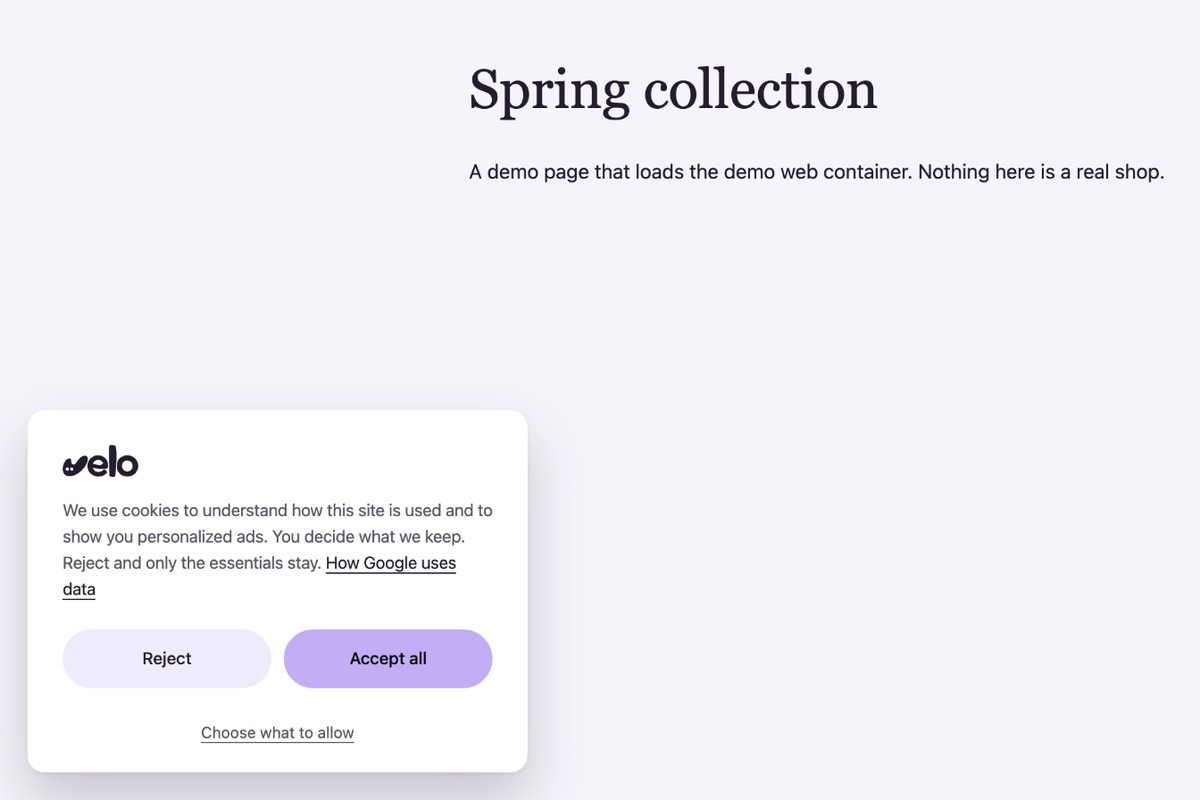 The banner on the page, loaded by the tag.
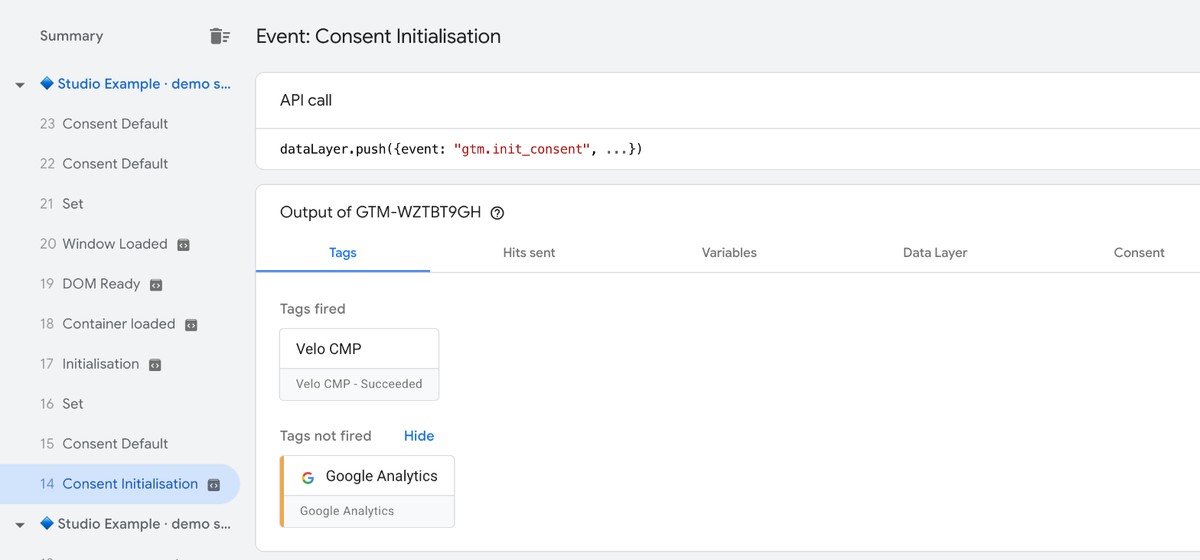 Velo CMP fires on Consent Initialization, before Google Analytics.
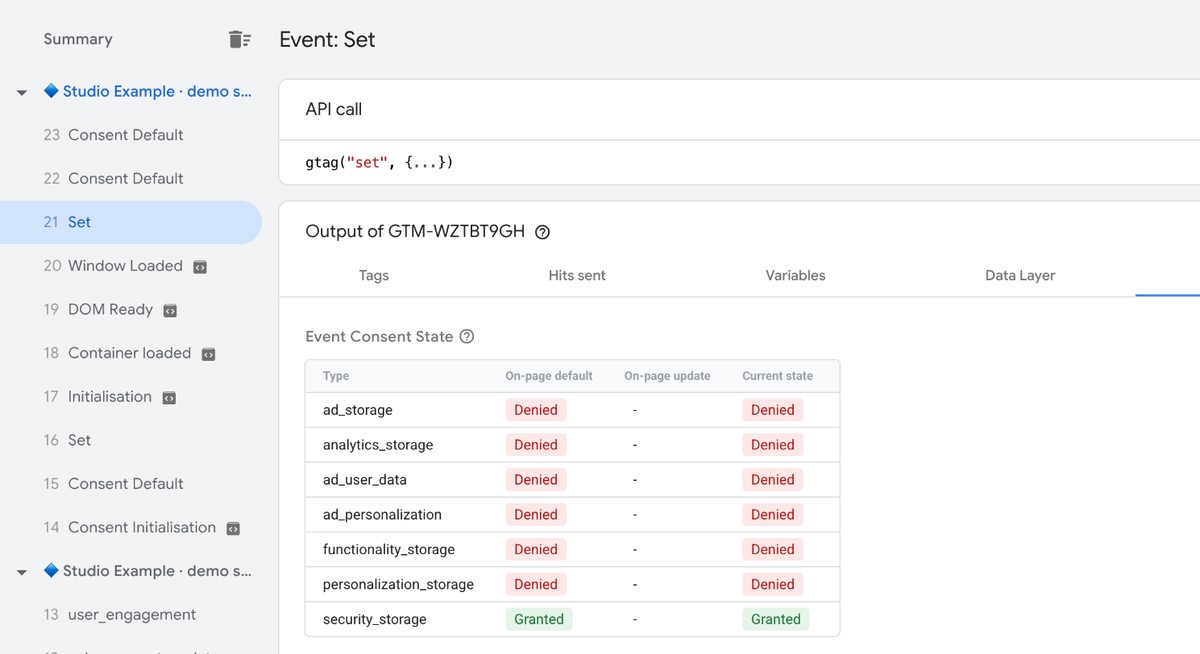 Before a choice, a visitor in Spain has everything denied except security_storage.
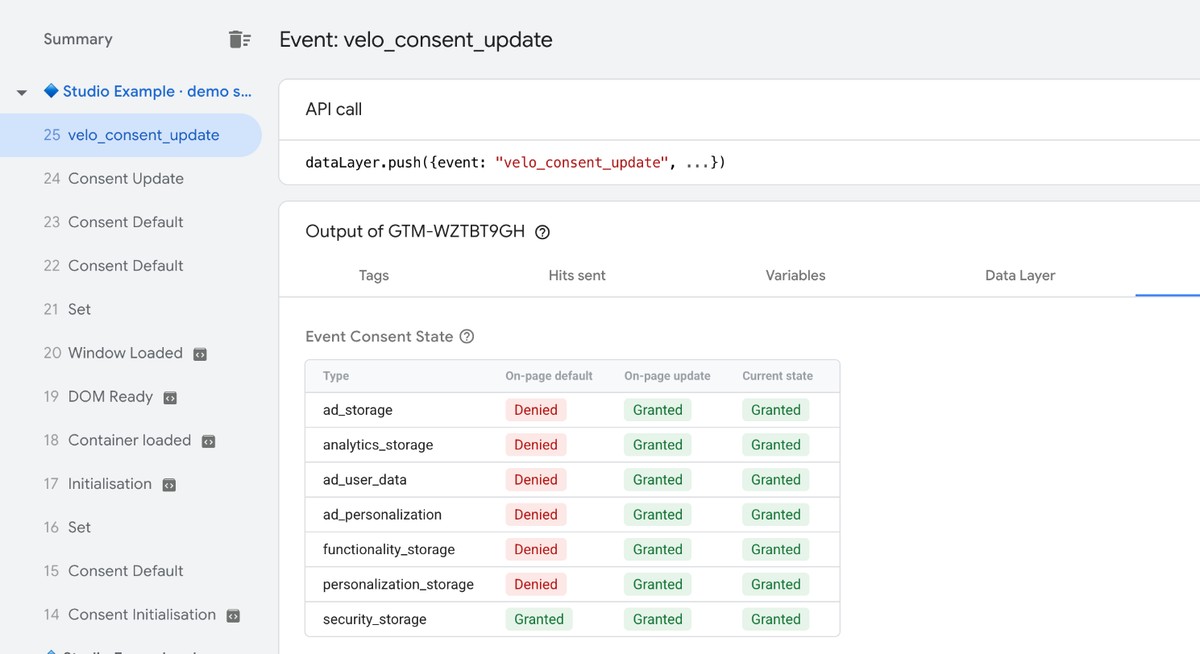 After Accept all, the update column shows Granted.
Publish the container
Preview only works in your own browser. To put Velo live, click Submit, give the version a name and click Publish.
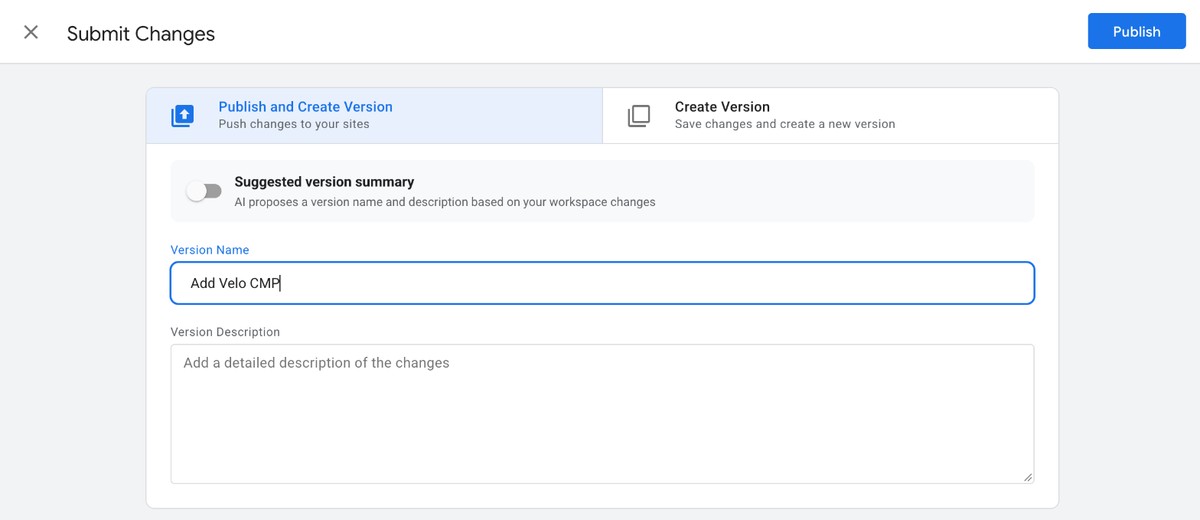 The Submit Changes screen, with Publish at the top right.
Check that Velo is live
Open your site in a private window and try the banner. Then open your Velo dashboard. Once your site has reported in, the Check connection step of your site’s setup says Velo is live.
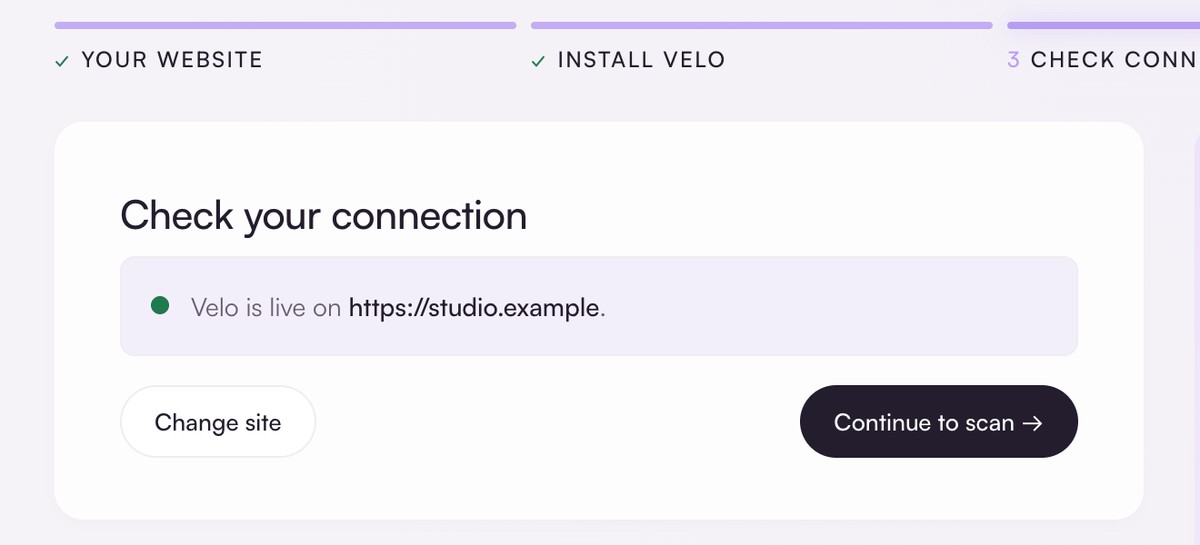 Velo’s setup once the site has reported in.
Hold any tag back until its category is allowed
Google’s own tags follow Consent Mode. Any other tag can be made to wait for its category with one variable and one trigger. The example below holds a tag back until analytics is allowed.
See what Velo sends
Each time a visitor chooses, and on every later page view while that choice is stored, Velo pushes velo_consent_update to the data layer. It carries velo_categories: analytics, ads, functional and personalization, each true or false.
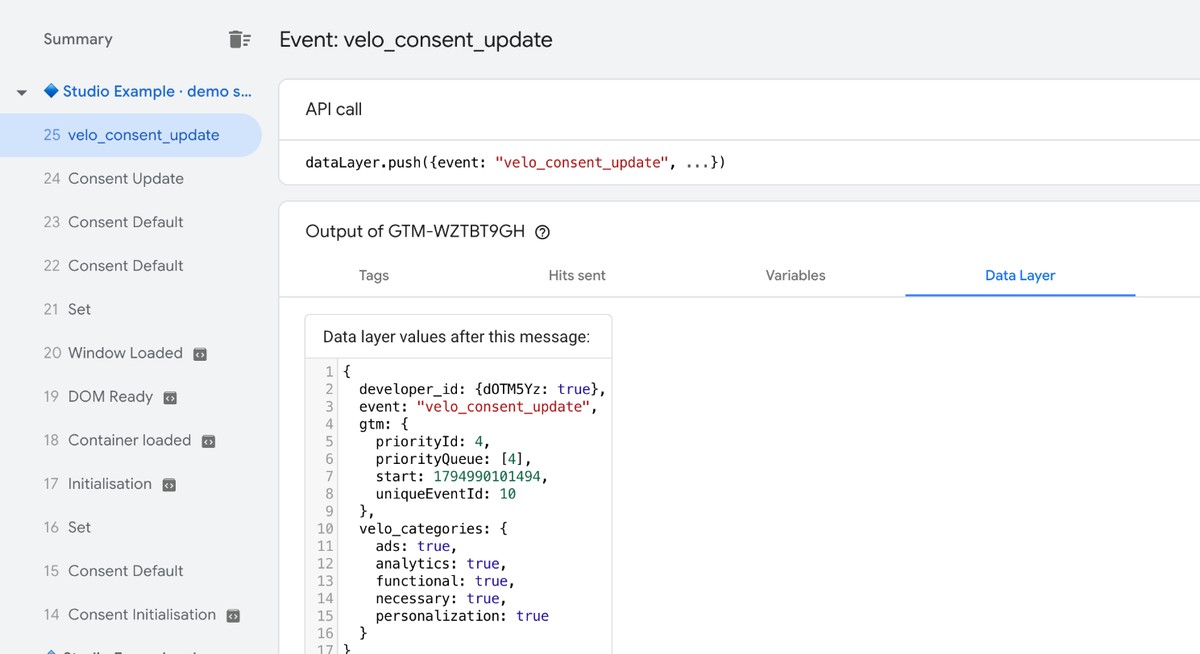 The event in Tag Assistant’s Data Layer tab, after Accept all.
Create the variable
Open Variables and click New under User-Defined Variables. Choose Data Layer Variable and set Data Layer Variable Name to velo_categories.analytics. For another category, end the name with ads, functional or personalization.
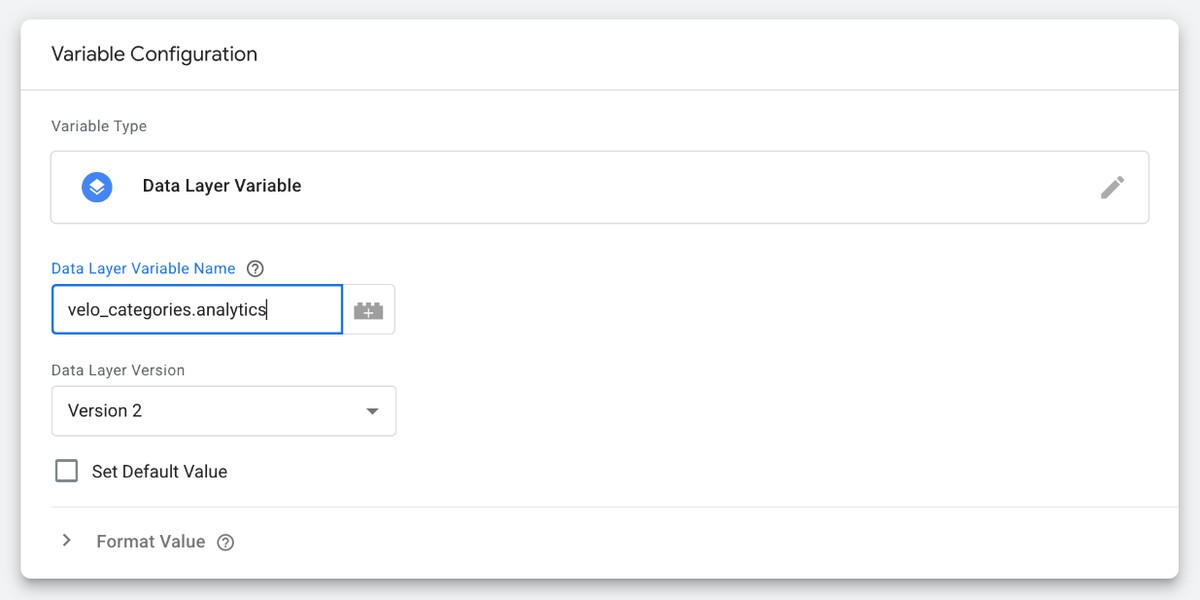 A Data Layer Variable that reads the analytics category.
Create the trigger
Open Triggers and click New. Choose Custom Event and set Event name to velo_consent_update. Select Some Custom Events and add one condition: your variable equals true.
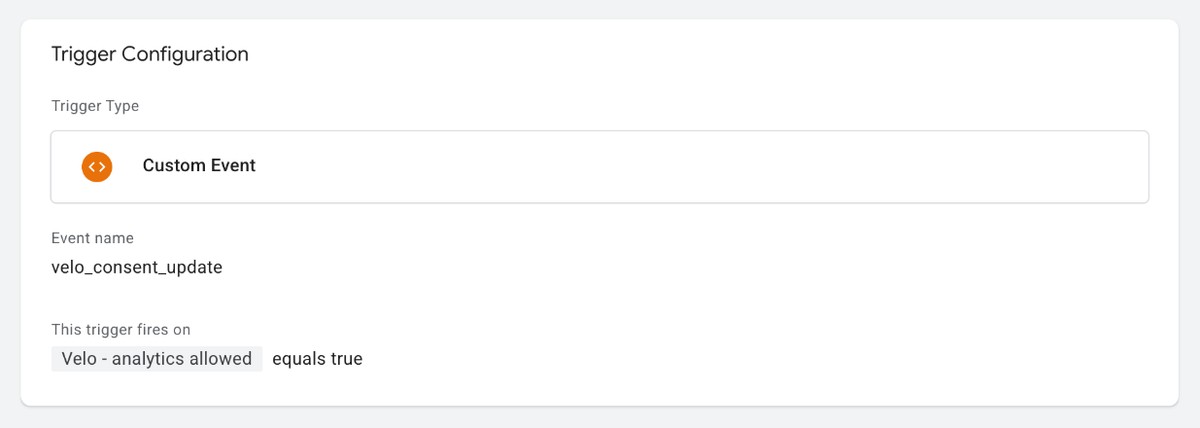 The trigger fires on velo_consent_update when the variable equals true.
Put the trigger on the tag
Open the tag you want to hold back and make this its only firing trigger. Velo sends the event again on every page view of a returning visitor, so the tag fires on each page where the category is allowed, not only straight after the click.
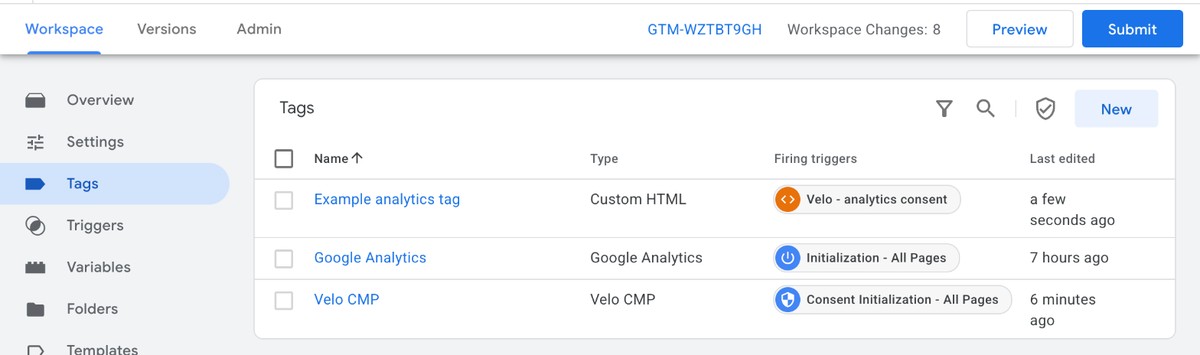 An example tag on the new trigger.
Check both outcomes in Preview
Allow only analytics in the banner and the tag fires on velo_consent_update. After Reject it stays under Tags not fired.
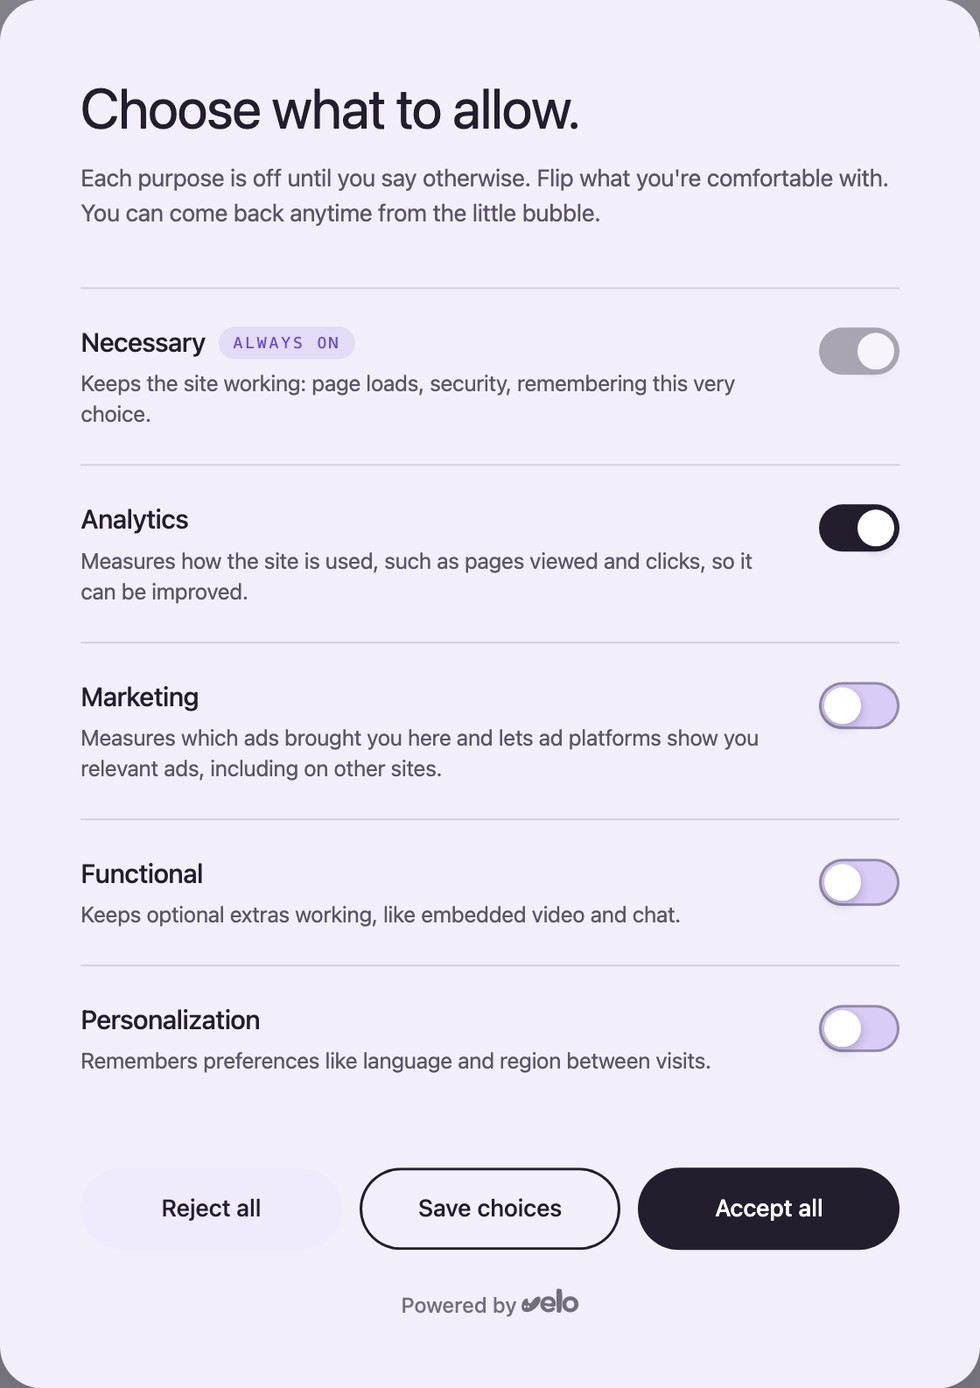 The banner’s second layer, with only Analytics switched on.
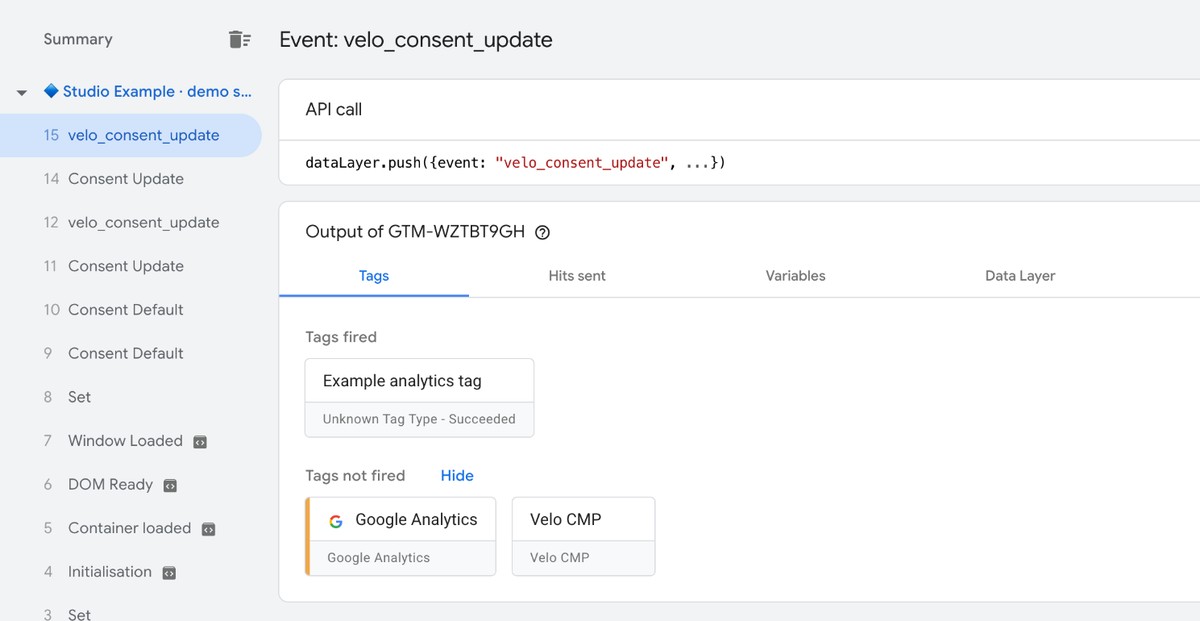 With analytics allowed, the tag fires.
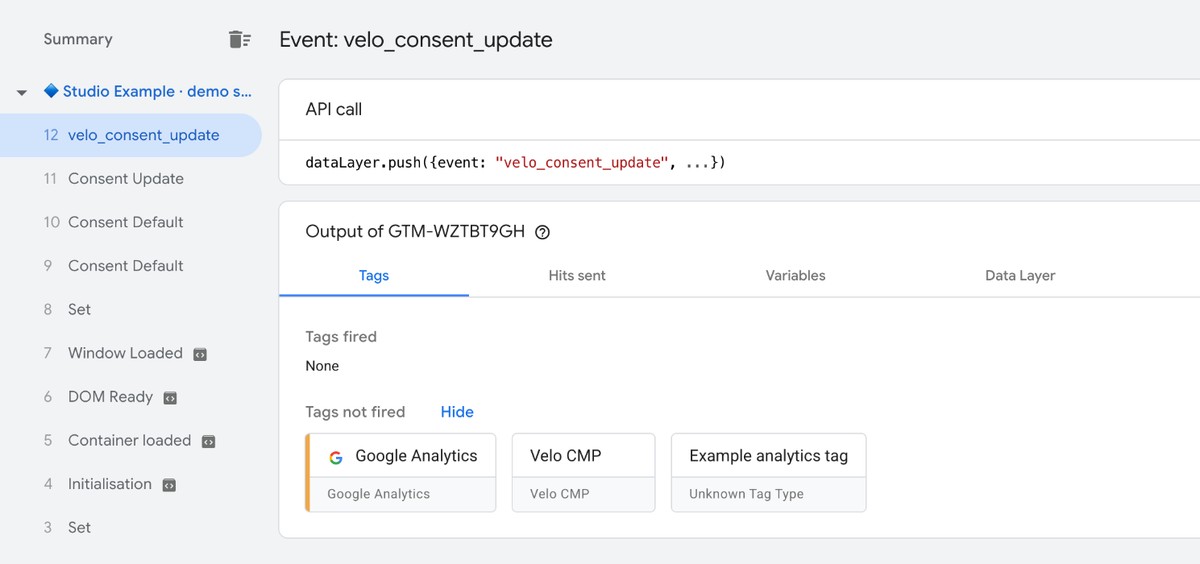 After Reject, it stays under Tags not fired.
Or hand it to an agent
Copy the prompt into Claude, ChatGPT, Cursor or whichever assistant you already use. It carries everything on this page: both routes, the order the tags have to load in, and the checks that prove it worked.
Install with AIThe prompt
Paste this prompt into your assistant, then provide your site ID and the complete installation snippet or GTM settings from your Velo dashboard.
Install Velo on Google Tag Manager.

Current guide: https://veloconsent.com/google-tag-manager

Before editing, get my site ID and complete installation snippet or GTM settings from the Velo dashboard. Confirm which consent tool and measurement tags already run on the site.

Choose one installation route:
A. If the site already uses Google Tag Manager, add the Velo CMP template (published by veloconsent) from the Community Template Gallery. Set my site ID, theme and API endpoint from the dashboard. Review the advanced options; ads_data_redaction and url_passthrough default to off. Use Consent Initialization – All Pages, then Preview and verify consent before publishing. Full steps: https://veloconsent.com/google-tag-manager

Preserve unrelated code. Avoid duplicate Velo installs or competing consent defaults. Do not assume a head placement or async loading alone guarantees tag order.

Check the published site in a fresh session. Verify the banner under the configured region rules, initial consent defaults, accept/reject updates and the velo_consent_update event. Check that non-Google tags follow their assigned categories. Test a second page and any separate checkout surface. Confirm signals reach the Velo dashboard.

Report what changed, where it changed and the result of each check. Describe any missing access or checks you could not complete.
From the journal
Notes on cookie banners, Consent Mode and the data that goes missing between them.
Is your cookie banner sending the Consent Mode v2 signal?
Do Canadian websites need Google Consent Mode v2?
Google Consent Mode v2 in Velo: what is new
Common questions about Velo on Google Tag Manager
The banner does not appear.
It’s almost always one of two things. Either the tag isn’t on the Consent Initialization – All Pages trigger, or the container version was never published. Open Preview and check where the tag fires, and you’ll usually see the fix within ten seconds.
Signals show granted by default in the EU.
Something else is competing with Velo, such as an old CMP tag, a consent default snippet in a Custom HTML tag, or a gtag default hard coded in the page. Only one thing in the stack may set defaults, so find the other one and remove it.
Two banners show at once.
The velo.js snippet is also installed directly in the page markup. When both are present, the attributes on the inline snippet win over the tag’s configuration, which makes debugging confusing. Keep one install path and remove the other.
My gated tag never fires.
Check that the event name on the Custom Event trigger is exactly velo_consent_update, with the underscores and no typos, and that regex matching wasn’t switched on by accident. Then confirm the condition reads the velo_categories variable, not the event name.
Rejections still send pings.
That is Consent Mode v2 advanced mode working as intended, and every Velo plan includes it. When a visitor declines, Google tags still load and send cookieless pings that carry the denied state. Google may use them to model some conversions when its eligibility and traffic conditions are met. Modelling is not guaranteed, and reports still show fewer observed conversions from visitors who decline. If a tag must stay silent until consent, gate it on velo_consent_update as shown above.
Is a Tag Manager install different from the snippet install?
No. You get the same banner, Consent Mode wiring, audit log and dashboard. The template route keeps your whole measurement stack in one container, which is why we recommend it in every platform guide.
Can an agent do this for me?
Yes. Copy the prompt in Install with agents, just below, into Claude, ChatGPT, Cursor or whichever assistant you already use. It includes the template, the trigger, the gating pattern for tags Consent Mode doesn’t cover, and the checks the agent has to run before it tells you the job is done.
Free for one site
Banner, scan and consent records for one site, free. Pro from €7 a month, plus VAT, for unlimited sites.